Hey all!
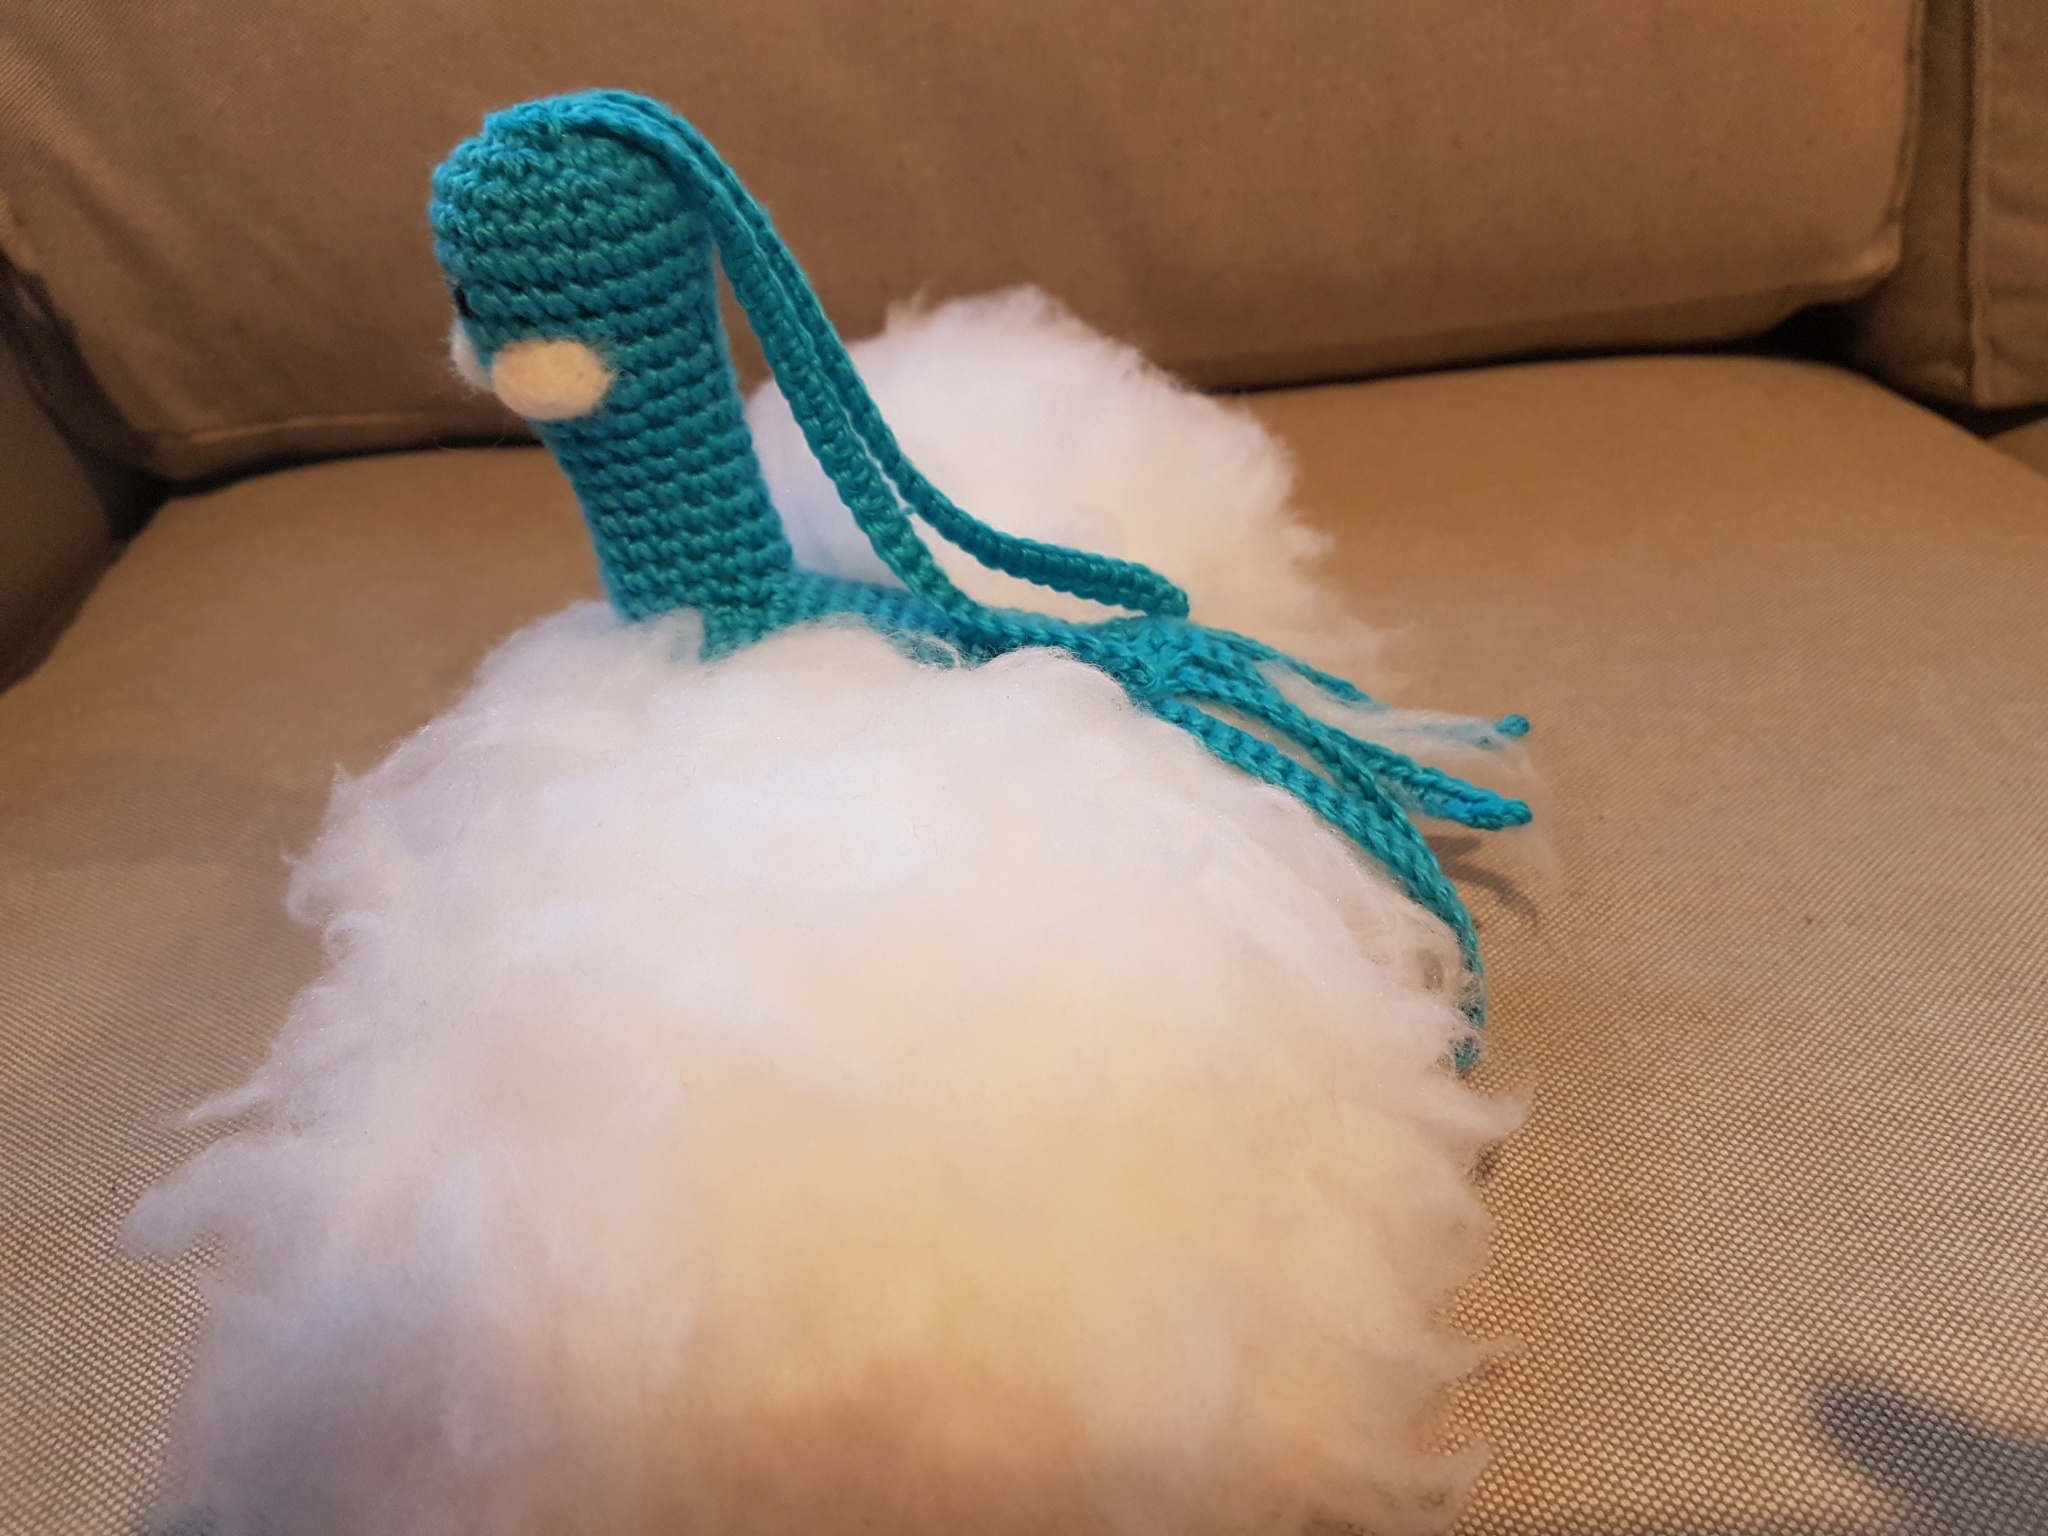
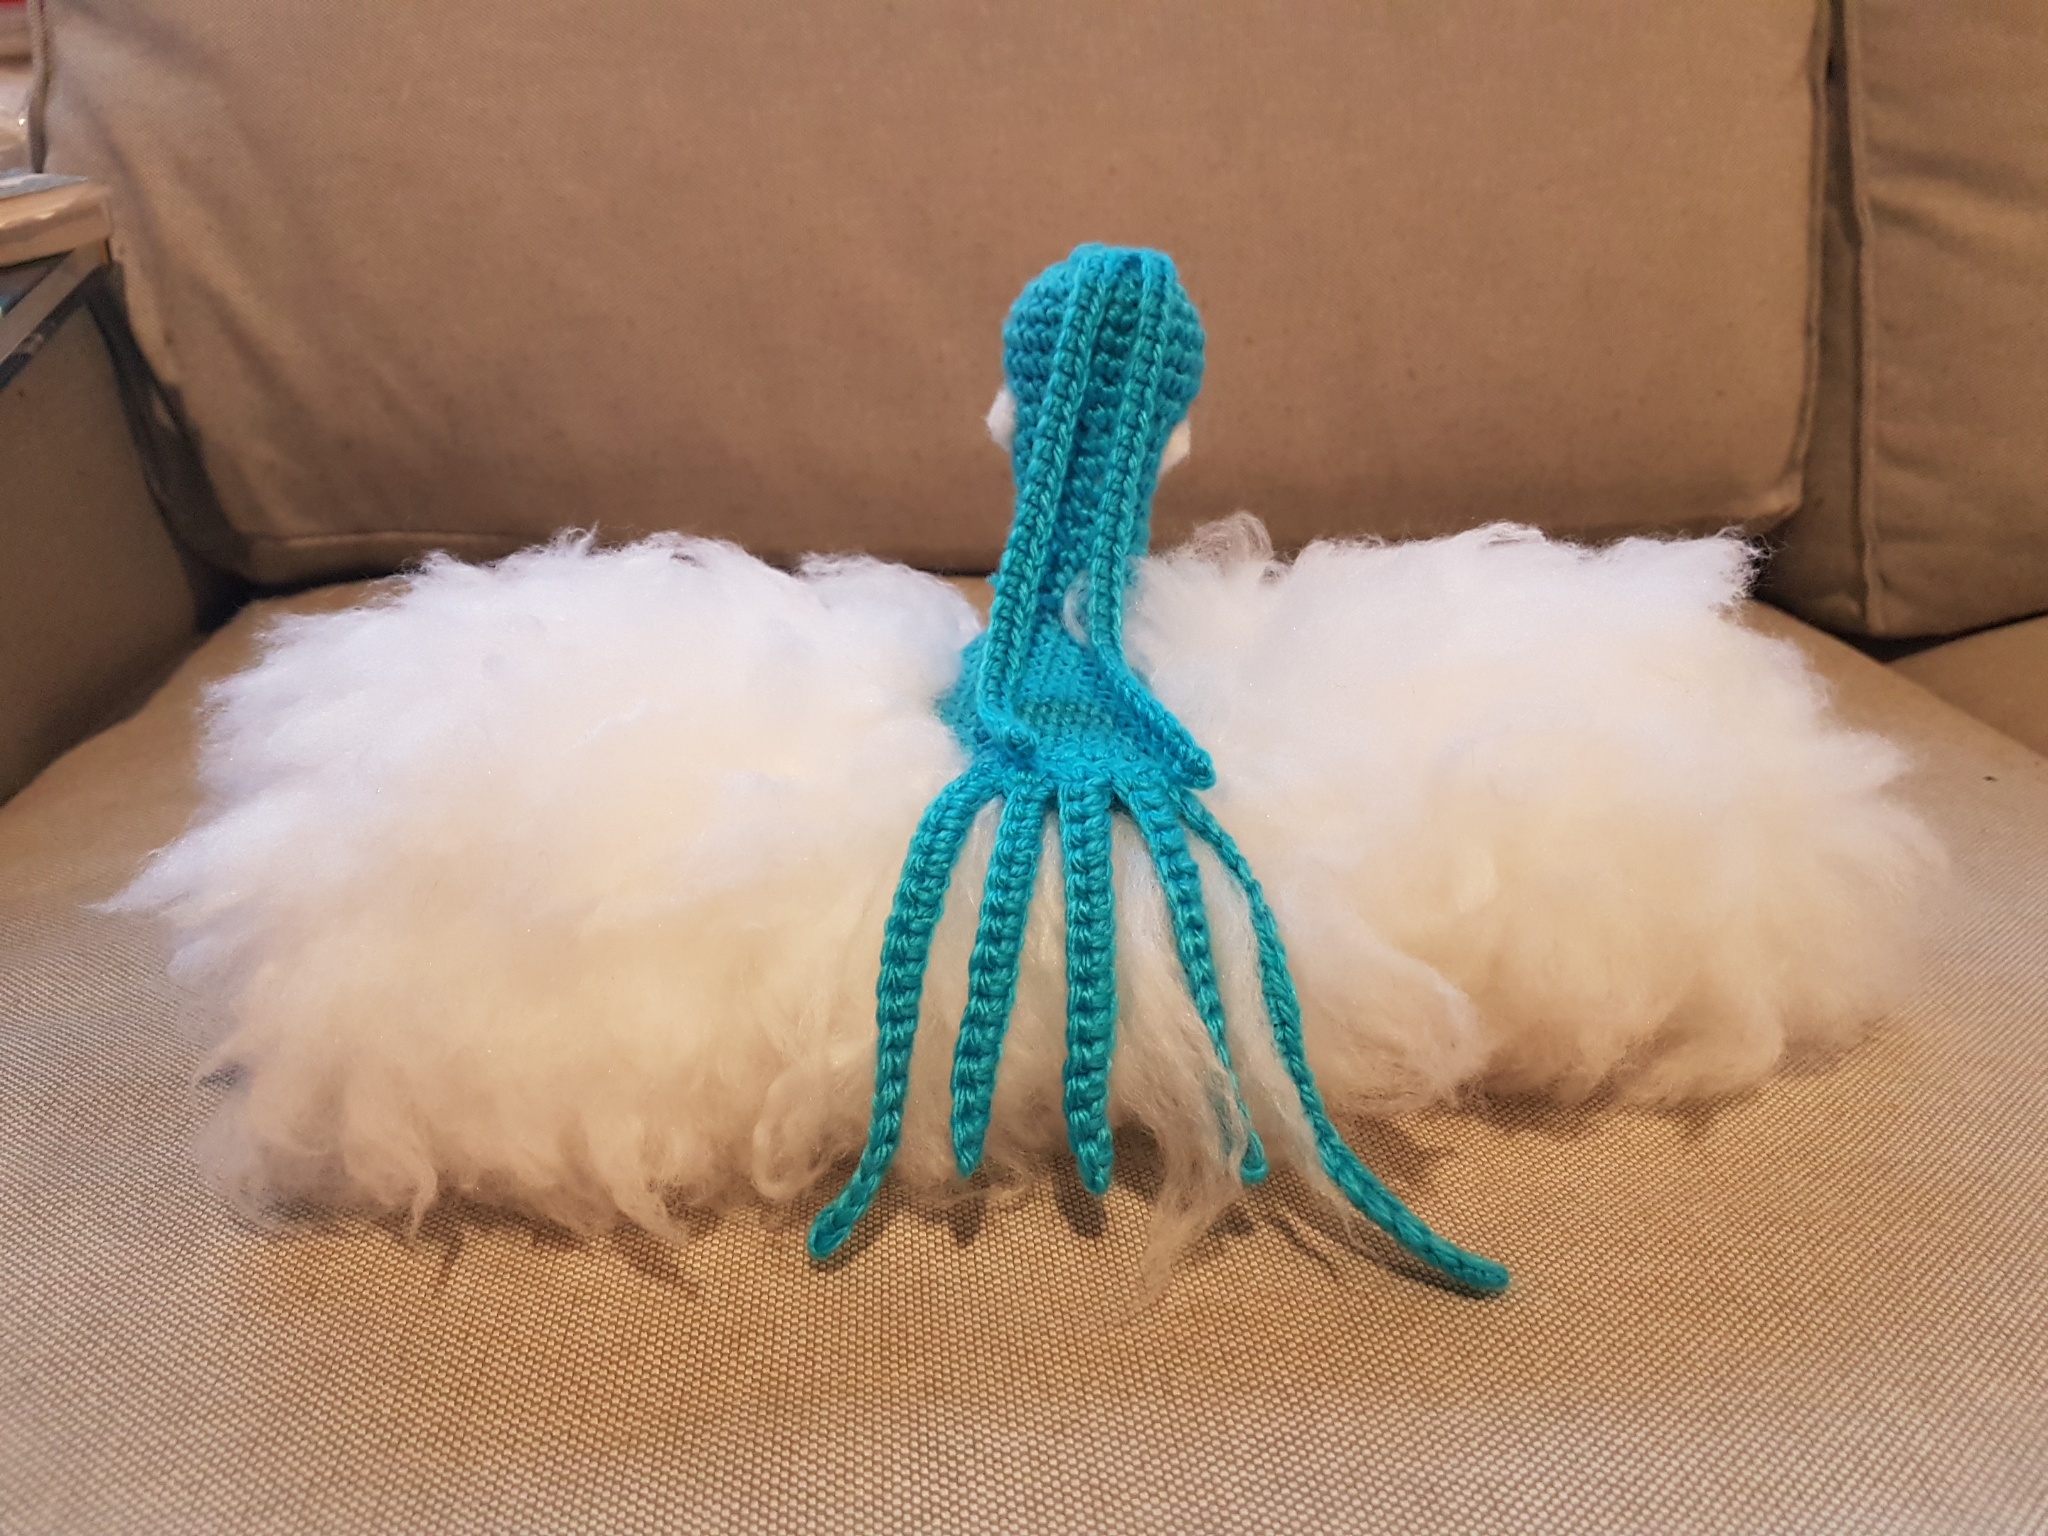
I am back with another pattern. It's been so long, I know! I have actually been quite productive but been making plush and writing up patterns but then not coming around to post them! I have a few to post but don't have as much time as I used to in regards to taking a lot of photos and editing them. But I have the instructions here that I'll get up! And a few photos of the finished plush.
If anybody has any queries in regards to specific steps, let me know in the comments or send me an email and I'd be happy to answer questions. :)
So first we have altaria! I forgot to note down sizing before I posted her off but she's about the same size as my other pokemon such as the eeveelutions.
Yarn - 8 ply/DK
Hook Size - 4.00
The wings are brushed yarn so if you look my growlithe tutorial on this blog it's the same process.
Body
blue
Round 1: CH2, SCx6 in the 2nd stitch from the hook (6)
Round 2: 2SCx6 (12)
Round 3: [2SC, SC]x6 (18)
Round 4: [2SC, SCx2]x6 (24)
Round 5: [2SC, SCx3]x6 (30)
Round 6: [2SC, SCx4]x6 (36)
Round 7 - 26: SCx30 (36, 20 rounds)
Round 27[SC2tog, SCx4]x6 (30)
Round 28: [SC2tog, SCx3]x6 (24)
Round 29: [SC2tog, SCx2]x6 (18)
Stuff but not too firmly.
Round 30: [SC2tog, SC]x6 (12)
Round 31: SC2togx6 (6)
Sew closed and flatten slightly for the body shape.
Head/Neck
blue
Round 1: CH2, SCx6 in the 2nd stitch from the hook (6)
Round 2: 2SCx6 (12)
Round 3: [2SC, SC]x6 (18)
Round 4: [2SC, SCx2]x6 (24)
Round 5 - 9: SCx24 (24, 5 rounds)
Round 10: [SC2tog, SCx2]x6 (18)
Round 11: [SC2tog, SCx4]x3 (15)
Round 12 - 20: SCx15 (15, 9 rounds)
Stuff firmly and sew onto the body.
Body Cloud
Around the sides - white
Chx11
Row 1: from the 2nd chain from the hook, SCx10 chain and turn
Row 2: LSx10 chain and turn
Row 3: SCx10
Then keep repeating row 2 and 3 until there is enough to wrap around the body. Sew onto the body.
Base
white
Chx6
Row 1: from the 2nd chain from the hook, SCx5 chain and turn
Row 2: LSx5 chain and turn
Row 3: SCx5
Then keep repeating row 2 and 3 until the piece is long enough to cover the base of the body. Sew onto the body
Then cut through all the loops. Brush out the yarn so it’s fluffy and keep the leftover fluff as this can be used to add extra volume.
Wings
white
Make 2
Chainx11
Round 1: From the 2nd chain from the hook, SCx9, SCx3, (then continue around the other side using the leftover loops), SCx9, 3SC (24)
Round 2: LSx24 (24)
Round 3: (2SC, LSx3)x6 (30)
Round 4 - 18: :Sx30 (30, 15 rounds)
Make sure all the loops are on the outside (if they’re not already). Stuff lightly so that it’s still a flat wing and sew onto the body by parting the fluff on the body. Cut all the loops and brush out. Use a needlefelting tool to tuck the ends in to create the cloud effect.
Tail
Chainx21
Row 1: From the 2nd chain from the hook SCx20, chain and turn
Row 2: Chainx16
Row 3: from the 2nd chain from the hoo, SCx15, chain and turn
Rows: 4 - 7: Repeat 2 - 3 twice more to get the 3 middle tail pieces
Rows 8 - 9: Repeat rows 1 - 2
Turn slightly and crochet along the edge where all the tail pieces are connected together
Row 1: SCx10. 2 stitches per tail piece. Chain and turn (I then crocheted the initial tail into the next row to avoid needing to weave it in later.
Row 2: SC2togx5 (5)
I then pinned down the tail onto my felting block, and heated the piece up for about a minute with a hair dryer on high to make it curl less and sewed onto the body.
Head Tails
Chainx31
Row 1: From 2nd chain from the hook, SCx30
Row 2: Chainx 31
Row 3: From the 2nd chain from the hook, SCx30
Turn slightly and crochet along the edge where the tail pieces meet.
Row 1: SCx4 Chain and turn
Row 2: SC2togx2 (2)
I pinned down the two pieces and heated up with a hair dryer like with the tail and then sewed onto the head.


It was a very different design. It is congratulations.
ReplyDeleteThank you so much for sharing your patterns. We need more like you in the world. You are so kind.
ReplyDeleteThis looks great! I was curious about what material you used to make the "cloud" and how you attached it? Thanks!
ReplyDeleteHello! Too lazy to log in but I’m the writer of this pattern and it’s just brushed yarn. If you have a peek through to the body part of the pattern it’s loop stitch that you then cut and brush.
DeleteThanks for replying! What is brushed yarn? Did you use a special type of white yarn?
DeleteHello! It’s not a special type of yarn. I use regular acrylic yarn. Once the loops are cut you brush them out. Have a look at my growlithe pattern for more information on this.
DeleteHi I'm making this pattern but can't figure out how big to make the base and body cloud pieces because I don't know where they're supposed to attach. I so hope you see this as I'm so anxious to finish this pokemon . its such a cute one and your finished one looks so good.
ReplyDeleteHello! The pieces are sewed on flat. So literally a piece the sews on over the top. Once the loops are brushed out it fluffs out. So a piece the same size as the body and then cover and sew down.
DeleteI'm sorry for being a pest but I'm still confused. There are two pieces, the base piece and the body cloud piece. Can you be more specific where the placement of these pieces are? Thank you
DeleteHi! Sorry I wouldn’t be able to be more specific as this pattern was written five years ago and short of making it again myself I wouldn’t be able to say exactly. At this time I have too many current commissions to be able to remake this plush.
Delete