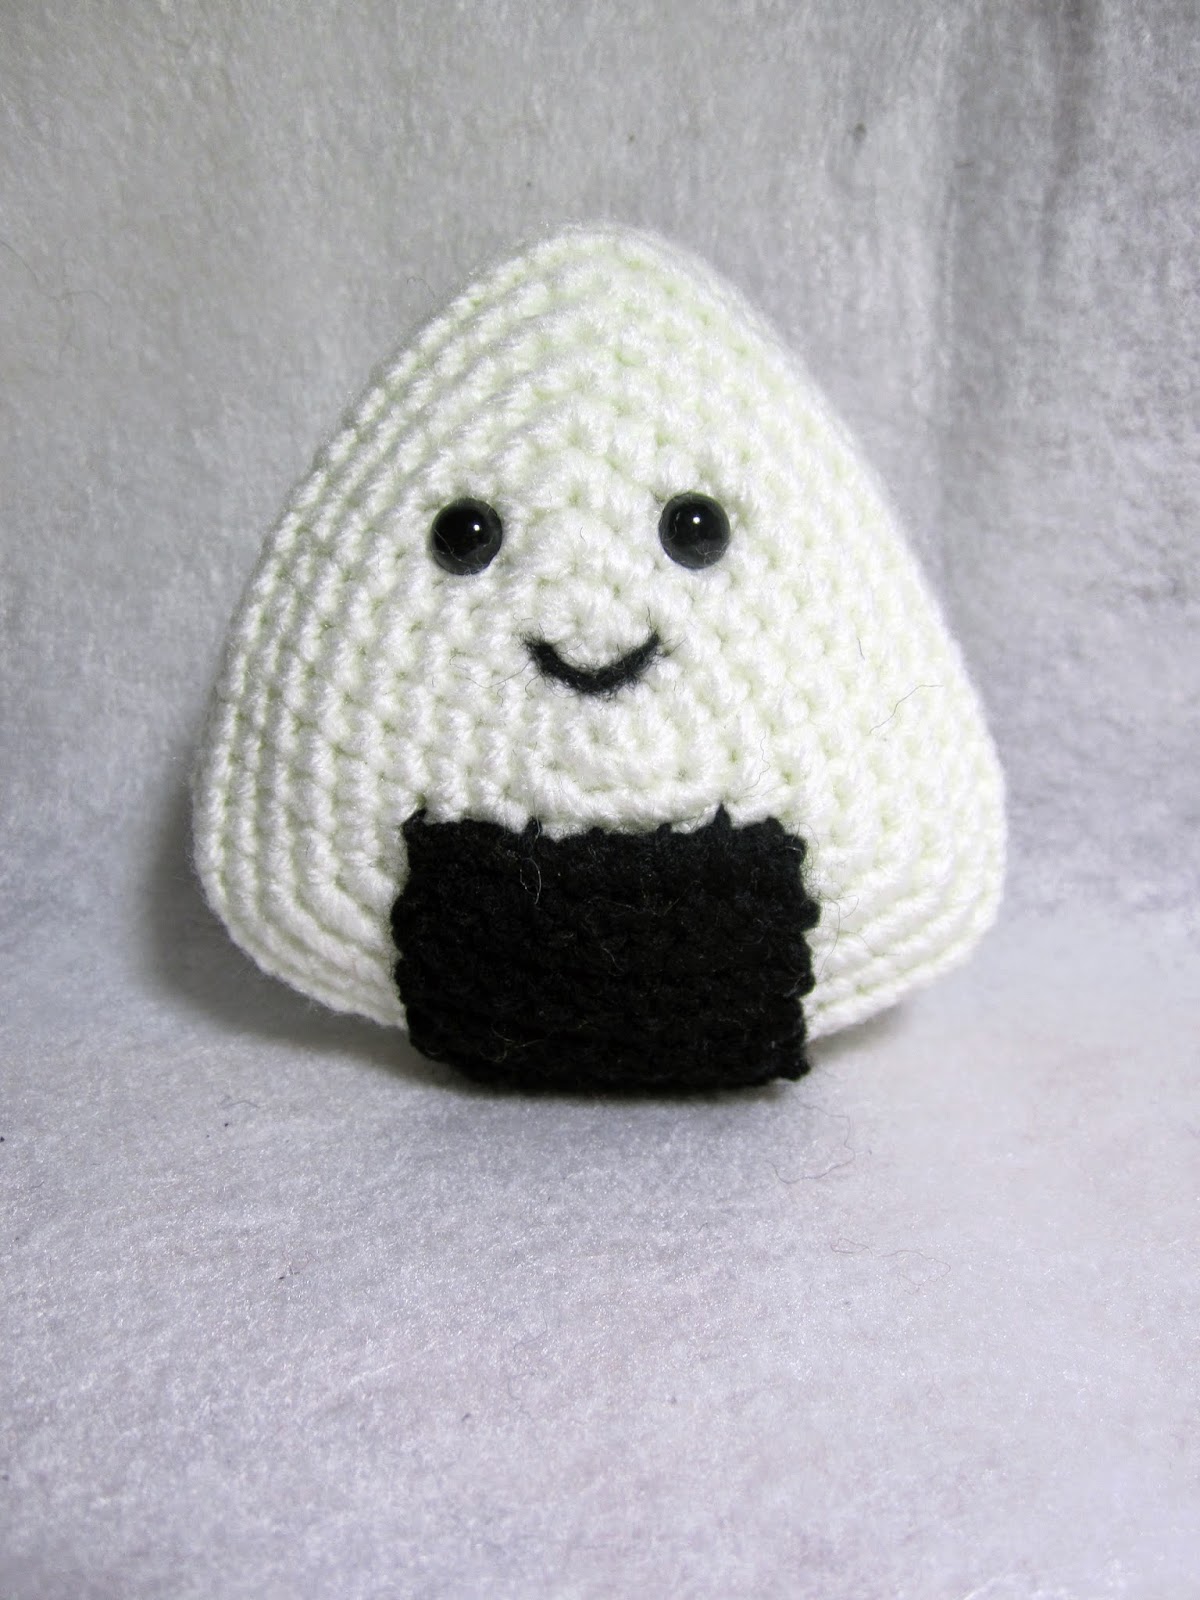
This time I present to you another Friday pattern and this one I think turned out exceptionally cute even if I do say so myself.
I made a little onigiri! And you can totally make one too by following the pattern below!!
Onigiri Main Body
Round 1: Ch 2, SCx6 in the 2nd ch from hook (6)
Round 2: [3SC, SC]x3 (12)
Round 3: SC, [3SC, SCx3]x2, 3SC, SCx2 (18)
Round 4: SCx2, [3SC, SCx5]x2, 3SC, SCx3 (24)
Round 5: SCx3, [3SC, SCx7]x2, 3SC, SCx4 (30)
Round 6: SCx4, [3SC, SCx9]x2, 3SC, SCx5 (36)
Round 7: SCx5, [3SC, SCx11]x2, 3SC, SCx6 (42)
Round 8: SCx6, [3SC, SCx13]x2, 3SC, SCx7 (48)
Round 9: SCx7, [3SC, SCx15]x2, 3SC, SCx8 (54)
Round 10: SCx54, using the front loop only (54)
Round 11: SCx54, this time crochet through both loops AND the loop that was dropped in the previous round. This will give it a nice sharp corner. That means with every stitch you should have 3 stitches on your hook instead of 2. (54)
Round 11 - 13: SCx54 (54, 3 rounds)
Attach the eyes.
Round 14: SCx54, using the front loop only (54)
With round 16, use the same technique as round 11.
Round 16: SCx8, [SC3tog, SCx15]x2, SC3tog, SCx7 (48)
Round 17: SCx7, [SC3tog, SCx13]x2, SC3tog, SCx6 (42)
Round 18: SCx6, [SC3tog, SCx11]x2, SC3tog, SCx5 (36)
Round 18: SCx5, [SC3tog, SCx9]x2, SC3tog, SCx4 (30)
Round 19: SCx4, [SC3tog, SCx7]x2, SC3tog, SCx3 (24)
Round 20: SCx3, [SC3tog, SCx5]x2, SC3tog, SCx2 (18)
Stuff firmly.
Round 21: SCx2, [SC3tog, SCx3]x2, SC3tog, SC (12)
Round 22: [SC3tog, SC]x3 (6)
Round 22 might be too hard to crochet. You can just sew the hole closed if that is easier. There will be an umeboshi to cover it or the black seaweed part which can also cover it depending on which route you want to take.
Umeboshi
Round 1: CH2, SCx6 in the 2nd stitch from the hook (6)
Round 2: 2SCx6 (12)
Round 3: SCx12 (12)
Leave a long tail and use this to sew onto the onigiri's back.The way I did this was to sew it half on, then stuff before sewing the rest down.
Seaweed
Row 1: CHx9
Row 2: Starting from the 2nd chain from the hook, SCx8 (8)
Row 3: Ch and turn, SCx8 (8)
Then repeat "Row 3" until it is long enough for what you want and sew to the onigiri.
Finally, embroider on the little mouth. I needlefelted the mouth onto this one.


I made a little onigiri! And you can totally make one too by following the pattern below!!
Round 1: Ch 2, SCx6 in the 2nd ch from hook (6)
Round 2: [3SC, SC]x3 (12)
Round 3: SC, [3SC, SCx3]x2, 3SC, SCx2 (18)
Round 4: SCx2, [3SC, SCx5]x2, 3SC, SCx3 (24)
Round 5: SCx3, [3SC, SCx7]x2, 3SC, SCx4 (30)
Round 6: SCx4, [3SC, SCx9]x2, 3SC, SCx5 (36)
Round 7: SCx5, [3SC, SCx11]x2, 3SC, SCx6 (42)
Round 8: SCx6, [3SC, SCx13]x2, 3SC, SCx7 (48)
Round 9: SCx7, [3SC, SCx15]x2, 3SC, SCx8 (54)
Round 10: SCx54, using the front loop only (54)
Round 11: SCx54, this time crochet through both loops AND the loop that was dropped in the previous round. This will give it a nice sharp corner. That means with every stitch you should have 3 stitches on your hook instead of 2. (54)
Round 11 - 13: SCx54 (54, 3 rounds)
Attach the eyes.
Round 14: SCx54, using the front loop only (54)
With round 16, use the same technique as round 11.
Round 16: SCx8, [SC3tog, SCx15]x2, SC3tog, SCx7 (48)
Round 17: SCx7, [SC3tog, SCx13]x2, SC3tog, SCx6 (42)
Round 18: SCx6, [SC3tog, SCx11]x2, SC3tog, SCx5 (36)
Round 18: SCx5, [SC3tog, SCx9]x2, SC3tog, SCx4 (30)
Round 19: SCx4, [SC3tog, SCx7]x2, SC3tog, SCx3 (24)
Round 20: SCx3, [SC3tog, SCx5]x2, SC3tog, SCx2 (18)
Stuff firmly.
Round 21: SCx2, [SC3tog, SCx3]x2, SC3tog, SC (12)
Round 22: [SC3tog, SC]x3 (6)
Round 22 might be too hard to crochet. You can just sew the hole closed if that is easier. There will be an umeboshi to cover it or the black seaweed part which can also cover it depending on which route you want to take.
Umeboshi
Round 1: CH2, SCx6 in the 2nd stitch from the hook (6)
Round 2: 2SCx6 (12)
Round 3: SCx12 (12)
Leave a long tail and use this to sew onto the onigiri's back.The way I did this was to sew it half on, then stuff before sewing the rest down.
Seaweed
Row 1: CHx9
Row 2: Starting from the 2nd chain from the hook, SCx8 (8)
Row 3: Ch and turn, SCx8 (8)
Then repeat "Row 3" until it is long enough for what you want and sew to the onigiri.
Finally, embroider on the little mouth. I needlefelted the mouth onto this one.


Comments
Post a Comment